Posted on May 30th 2014 by trekprops.de.
 If you know me, then you also know that my blog posts can get a bit lengthy at times. This one, however, I will try to keep a bit shorter than usual. What I want to describe to you however are some of the problems that presented themselves while casting the Neutrino Probe components for which I have all the molds now. Also, I tried a few new techniques with these parts to improve the appearance of the product and make the assembly process easier. What new techniques you ask? Read on to find out. [More…]
Posted on Apr 2nd 2014 by trekprops.de.
If you want to make more than one unit of any given prop replica, it is inevitable to make molds of all the parts you need. This way you’ll be able to make multiple resin casts of each piece. For the Neutrino Probe, this presented a few unique challenges I had to tackle along the way due to the special nature of the body, its prototype parts and the fact that I wanted to put electronics in there. In this blog post I’ll show you exactly what I thought would work, what did’t work and – most importantly – what I ended up doing. [More…]
Posted on Jul 5th 2013 by trekprops.de.
 The heart of every prop are its electronics. Lights, blinking and flashing back and forth, maybe even a sound-module, this is what makes a prop feel authentic instantly. In case of my Neutrino Probe replica, it’s “only” lights, which doesn’t mean it’s boring however. Powered by a small rechargeable battery – which is a first for me by the way – this board will bring the engineering tool to life. But instead of describing it, I decided to make a video this time to show you and tell you all about it. What are you waiting for? Jump right in and watch! [More…]
Posted on Nov 19th 2010 by trekprops.de.
 Well, well, well, what do we have here? Might that be a long overdue update on the Neutrino Probe project? “No, that’s impossible!”, you might think. After all, the last update was almost exactly one year ago! How could this still be a go? Well, you better believe it ’cause this baby is alive and kickin’! Still not positive? Jump past the break to look for yourself. Have you ever been told that you’re hard to convince of something? [More…]
Posted on Nov 22nd 2009 by trekprops.de.
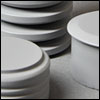 After my efforts of starting a Neutrino Probe replica were suddenly brought to a halt last week, I couldn’t do anything but wait for my Dad to repair the lathe which had broke down on us. Fortunately, he was able to find a new capacitor quickly and replaced it in no time at all. So, we could schedule a new session to get back to work. This time, there were no interruptions and I was able to continuously work on the three main parts for two days. [More…]
Posted on Nov 10th 2009 by trekprops.de.
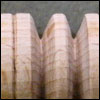 Bad News. Today I made my first attempt to use a turning lathe to make the main parts for the Neutrino Probe from wood. For this purpose I went to my parents house where my dad has the required equipment. Well, everything went pretty smoothly at first and while working on a test piece I got confident to be able to shape the wood in such a way to mimic my schematics almost exactly. So far, so good. [More…]
Posted on Nov 8th 2009 by trekprops.de.
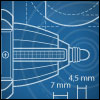 There is one prop that I wanted to build forever and never got around to it. In fact, this goes back to the early days on ASAP, when I just got into the hobby. At that time, I didn’t have a lot of experience obviously and was just figuring out how to build stuff. So, after seeing this prop in “Star Trek: Captain’s Chair“, my first impulse was to build it because it looked cool and I had recognized it from the show. [More…]
Posted on Oct 30th 2005 by trekprops.de.
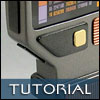 Welcome to the online assembly instructions for my ODN scanner hero kit. In this tutorial, you’ll see how to prepare the electronics for installation and how to insert them into the body. You’ll also learn how to prepare and assemble the hollow resin shells to build up a fully functional hero ODN scanner. First, here’s a pic of the entire kit: 2 resin body parts, electronics, acrylic rod, display graphics, styrene (1.0 mm and 1.5 mm), 2 screws, templates for the styrene details. That’s all you need, so let’s begin! [More…]
Posted on Oct 29th 2005 by trekprops.de.
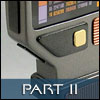 In this second installment of my ODN Scanner progress report I will describe how the finished master model (see Part I) is used to fabricate a silicone rubber mold which then can be used to cast resin kit parts.
Because the finished prop was supposed to contain an electric circuit with a super bright red LED and five green sequencing lights, the mold had to be done in a way so that the [More…]
Posted on Oct 28th 2005 by trekprops.de.
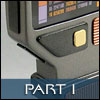 Welcome to the first part of my progress report covering the creation of my ODN Scanner! In this part I will show you how I scratchbuilt the prototype (the so-called master model) of this prop that I will later cast in resin. Part II and the Tutorial will then cover how I did the silicone rubber mold and how to build up one of the resulting kits. [More…]
 If you know me, then you also know that my blog posts can get a bit lengthy at times. This one, however, I will try to keep a bit shorter than usual. What I want to describe to you however are some of the problems that presented themselves while casting the Neutrino Probe components for which I have all the molds now. Also, I tried a few new techniques with these parts to improve the appearance of the product and make the assembly process easier. What new techniques you ask? Read on to find out. [More…]
 The heart of every prop are its electronics. Lights, blinking and flashing back and forth, maybe even a sound-module, this is what makes a prop feel authentic instantly. In case of my Neutrino Probe replica, it’s “only” lights, which doesn’t mean it’s boring however. Powered by a small rechargeable battery – which is a first for me by the way – this board will bring the engineering tool to life. But instead of describing it, I decided to make a video this time to show you and tell you all about it. What are you waiting for? Jump right in and watch!
  Well, well, well, what do we have here? Might that be a long overdue update on the
  After my efforts of starting a Neutrino Probe replica were suddenly brought to a halt
  Bad News. Today I made my first attempt to use a turning lathe to make the main parts for the Neutrino Probe from wood. For this purpose I went to my parents house where my dad has the required equipment. Well, everything went pretty smoothly at first and while working on a test piece I got confident to be able to shape the wood in such a way to mimic
  There is one prop that I wanted to build forever and never got around to it. In fact, this goes back to the early days on
  Welcome to the online assembly instructions for my ODN scanner hero kit. In this tutorial, you’ll see how to prepare the electronics for installation and how to insert them into the body. You’ll also learn how to prepare and assemble the hollow
  In this second installment of my ODN Scanner progress report I will describe how the finished master model
  Welcome to the first part of my progress report covering the creation of my ODN Scanner! In this part I will show you how I scratchbuilt the prototype (the so-called master model) of this prop that I will later cast in